
As businesses become more and more dependent on cloud solutions, it is crucial to efficiently manage network resources; distributing software updates can have a huge impact on bandwidth, especially when hundreds or thousands of devices are trying to download the same update simultaneously.
For this reason, devices managed by Microsoft Intune should be configured to take advantage of the Delivery Optimization (DO) feature: this caching solution integrated into the operating system uses peer-to-peer content sharing.
In addition to adopting the DO feature, a further step forward in terms of content sharing is the Microsoft Connected Cache (MCC) feature that addresses this need with an innovative approach, helping businesses reduce latency, improve network efficiency and optimize the user experience. According to a Microsoft report, companies that implemented Microsoft Connected Cache saw a reduction in Internet traffic usage of up to 90% during monthly Windows Update patching.
In this article, we’ll explore what Microsoft Connected Cache is, how to implement it, and why it might be a strategic choice for decision makers.
Overview
Microsoft Connected Cache is a software caching solution that delivers Microsoft-distributed content, such as Windows Updates and/or Intune Win32 apps to Windows 10/11 devices. The technology behind Microsoft Connected Cache is quite simple: MCC uses a server that acts as a local distribution point for requested content, allowing enterprise devices to download content directly from the local cache server instead of Microsoft’s servers.
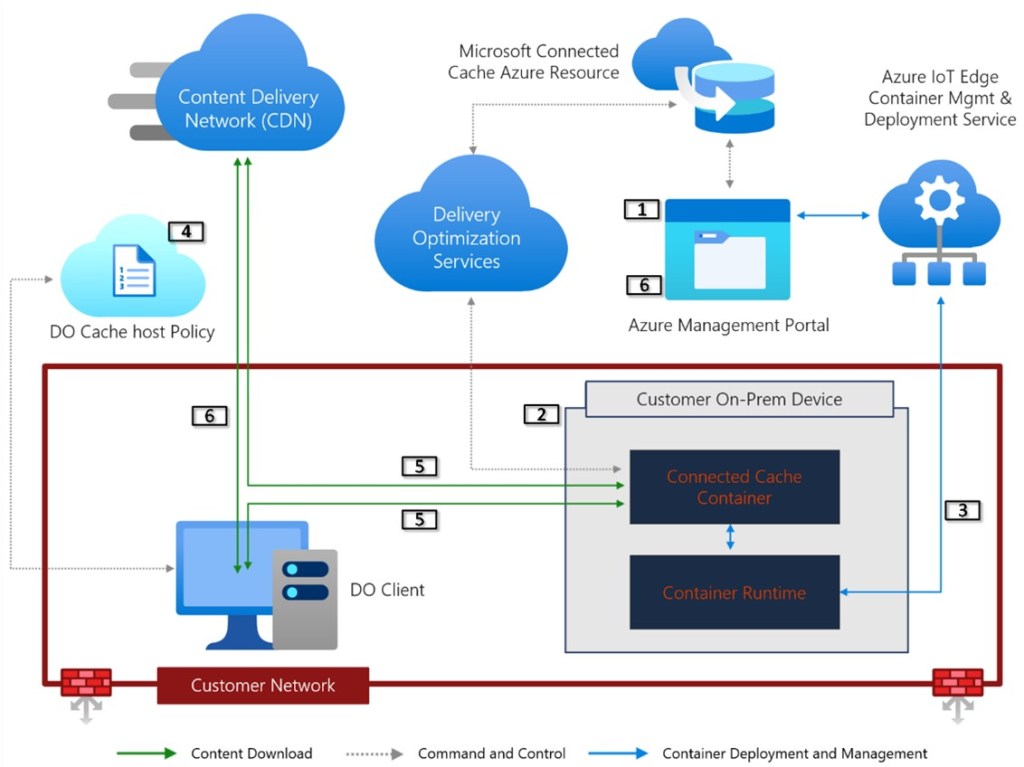
When a device on the corporate network requests a software update or package, the content is first checked by the MCC server; if the content is available, it is delivered directly to the device without additional Internet traffic. If the content is not available in the local cache, it is downloaded from the Microsoft Content Delivery Network (CDN) and cached for future requests; this will ensure that subsequent requests for the same content will be processed directly from the cache, reducing latency and bandwidth consumption.
Considering the above, some key benefits of adopting Microsoft Connected Cache can be identified, such as:
- Reduced bandwidth consumption: With local caching, Microsoft Connected Cache can significantly reduce Internet traffic, especially during monthly updates; this is particularly beneficial for companies with limited connections or remote offices that rely on slow Internet connections.
- Improved performance: Downloading content from the local cache, rather than the cloud, reduces latency and speeds up the update process for end users.
- Easy management and scalability: Integrated with the Azure portal, MCC makes it easy to monitor caching at the network level, and scalability is ensured by support for enterprise environments.
- Security and compliance: Cached content is accessible only by authorized devices, reducing the risk of unauthorized access
Requirements
The requirements to activate the Microsoft Connected Cache feature are:
- Licensing
- Valid Azure subscription
- Windows Enterprise E3 or E5 (included in Microsoft 365 F3, E3, or E5)
- Windows Education A3 or A5 (included in Microsoft 365 A3 or A5)
- Cache node (Windows)
- OS Windows 11 or Windows Server 2022 + CU March 2024
- Nested Virtualization support
- Cache node (Linux)
- OS Ubuntu 22.04 or Red Hat Enterprise Linux (RHEL) 8.* – 9.*
- Default container engine (Podman) must be replaced with Moby
- Network
- Reachability of the following endpoints
- No services/applications using port 80
- Multiple NICs on a single Connected Cache host is not supported
- NIC and BIOS should support SR-IOV for optimal performance
Microsoft Connected Cache Resource Creation
The first step to enable the MCC feature is to create a dedicated resource on the Azure portal; the following steps describe the creation procedure:
- Sign in to the Azure portal with administrative credentials
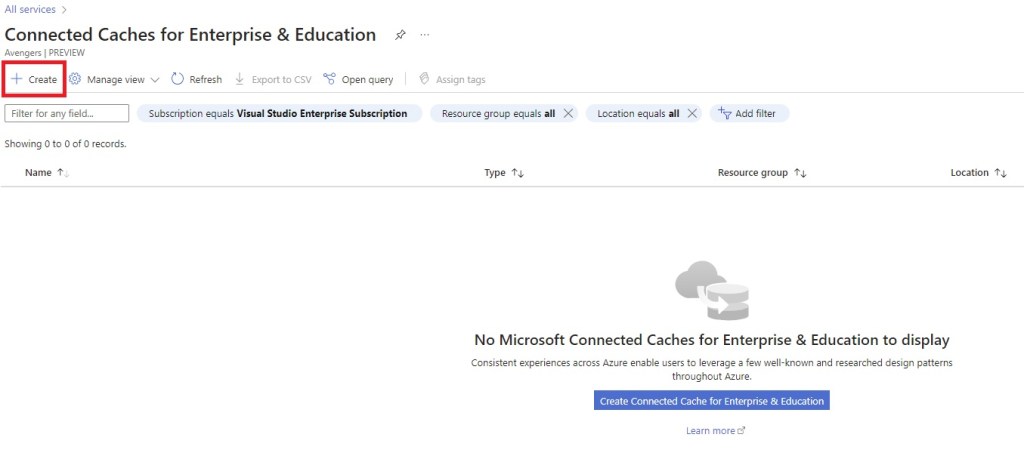
- Go to the Resources section and search for the resource > Microsoft Connected Cache for Enterprise and Education

- Select the resource
- Press the Create button
- Select the subscription, the Resource Group within which the resource will be created, the region and enter a name to assign to the Microsoft Connected Cache
- Proceed with the creation of the resource

- Verify that the creation process completes successfully and access the newly created resource

Cache node creation and configuration
Once you have finished creating the Microsoft Connected Cache resource, you now need to create a Cache node:
- Sign in to the Azure portal with an administrative account
- Go to the Microsoft Connected Cache for Enterprise and Education section and select the previously created resource
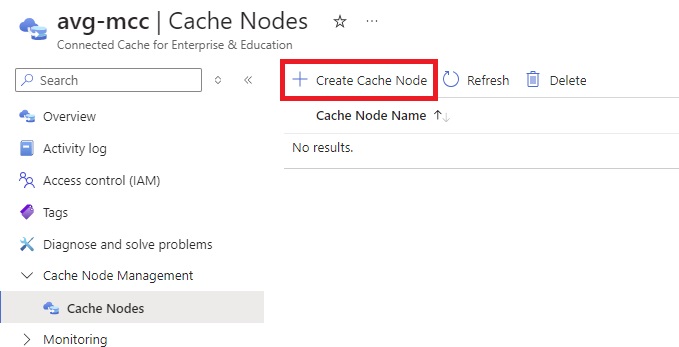
- Expand the Cache Node Management section and select the Cache Nodes option
- Press the Create Cache Node button
- Enter the name you want to assign to the node and select the OS on which the functionality will be installed

- Press the Create button
- The process will be completed when the node is in Not Configured state

- Select the newly created resource and proceed with the required configurations
- Set the cache that will be reserved for content (consider an additional 8 GB required for the installation of the feature)
- Set the proxy configuration in case the Internet connection is via a proxy
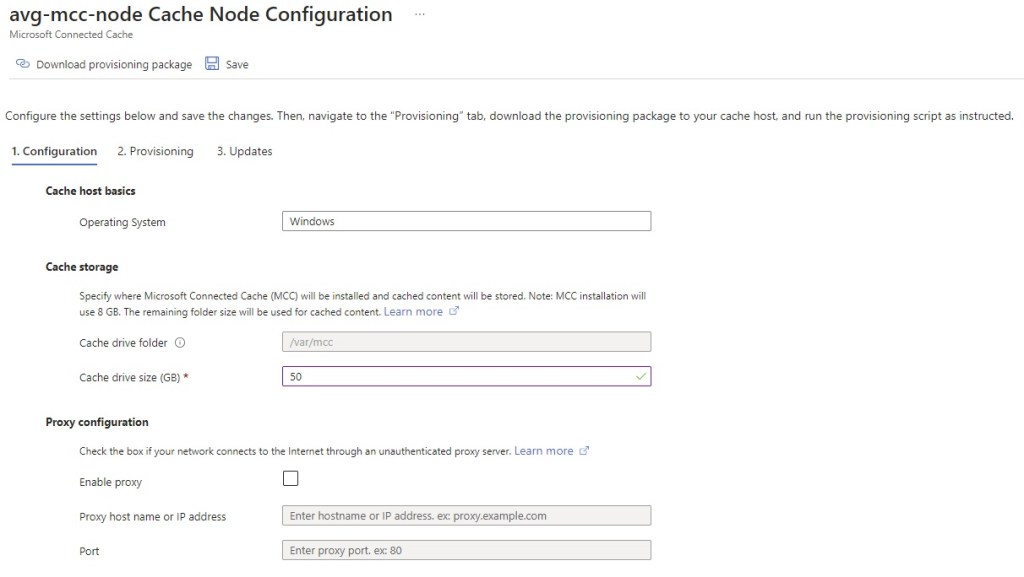
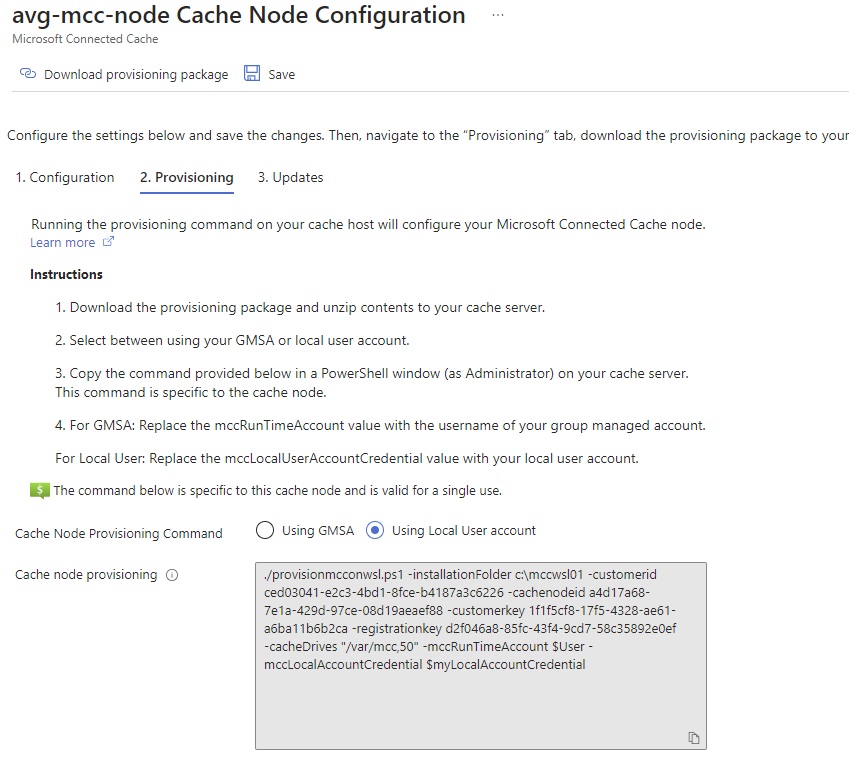
- Press the Save button and proceed with the configuration by accessing the Provisioning tab
- Download the Provisioning Package using the appropriate button
- Select the type of account that will be used: GMSA or Local Account (in this environment, the Local Account option has been selected)
- Copy the command that will have to be executed on the Connected Cache server present in the Cache node provisioning section
- Access the server set up to host the Microsoft Connected Cache feature
- Open a command prompt in administrative context and proceed with the installation of the WSL (Windows Subsystem for Linux) component using the command
wsl.exe --install --no-distribution
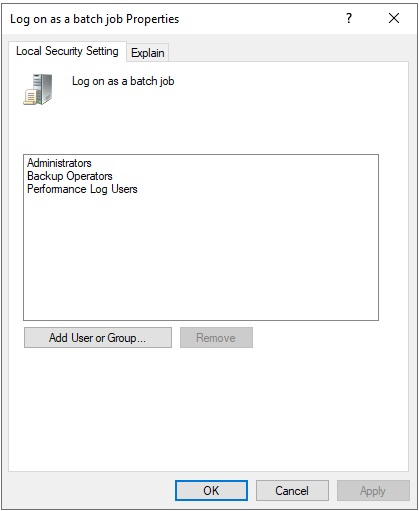
- Make sure that the local account you want to use has Log on as a batch job rights
- Copy the provisioning package previously downloaded and extract the contents into a specific folder
- Start Powershell in administrative context, go to the folder where the provisioning package was extracted and execute the following commands
Set-ExecutionPolicy -ExecutionPolicy Unrestricted

$User = "%LocalMachineName%\%Username%" (es: $User = "MCC\Admin")

$myLocalAccountCredential = Get-Credential (In the credentials request window, enter the user and password of the local account)
- Run the cmdlet copied earlier from the Azure portal
Ex: ./provisionmcconwsl.ps1 -installationFolder c:\mccwsl01 -customerid <customerid> -cachenodeid <cachenodeID> -customerkey <customerkey> -registrationkey <registrationkey> -cacheDrives "/var/mcc,50" -mccRunTimeAccount $User -mccLocalAccountCredential $myLocalAccountCredential
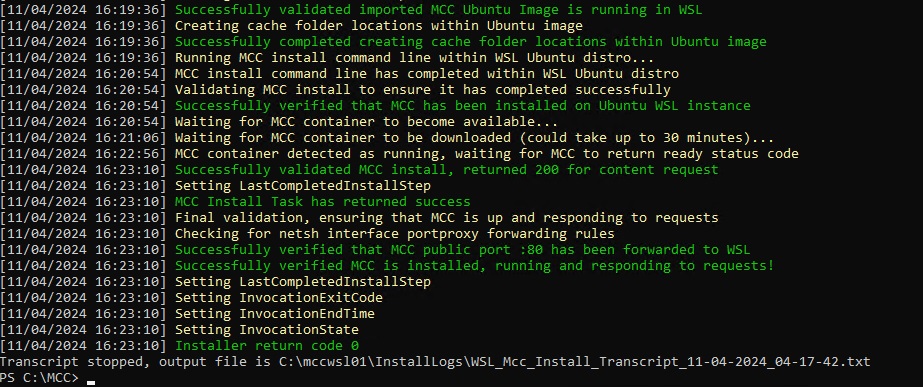
- Verify from the Azure portal that the cache node status is Healthy

- Verify that the container is working correctly using the following command
wget http://localhost/filestreamingservice/files/7bc846e0-af9c-49be-a03d-bb04428c9bb5/Microsoft.png?cacheHostOrigin=dl.delivery.mp.microsoft.com
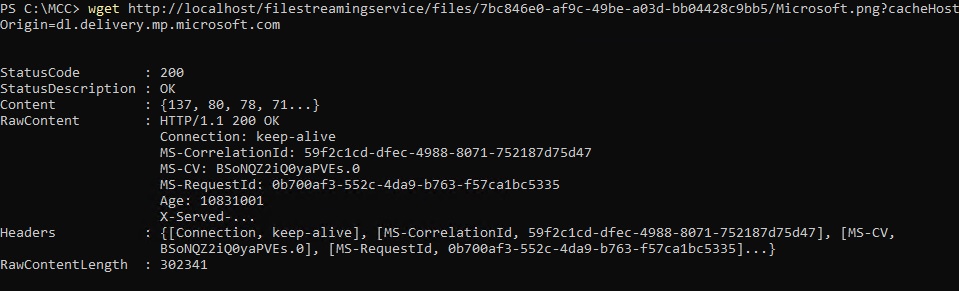
- Verify that the content is downloaded correctly from the MCC node by accessing the following URL http://%5BHostMachine-IP-address%5D/filestreamingservice/files/7bc846e0-af9c-49be-a03d-bb04428c9bb5/Microsoft.png?cacheHostOrigin=dl.delivery.mp.microsoft.com (replace HostMachine-IP-address with the IP address of the MCC server)
- If everything works correctly, a png file will be downloaded
On the Microsoft Connected Cache side, you can check the respective content download metrics through the Azure portal:

Configuration Policy creation for Cache Node definition
The last step needed for a correct adoption of MCC is to set up the Cache node in the configuration of the Delivery Optimization functionality; we report below the steps needed to perform this type of configuration through a specific Configuration policy on Intune:
- Access the Microsoft Intune admin center console with administrative credentials
- Access the Devices > Windows > Configuration section
- Create a new policy using the Create > New Policy button
- Select the Windows 10 and later option from the Platform drop-down menu
- Select the Settings Catalog option from the Profile type drop-down menu
- Proceed with the creation of the new policy using the Create button
- Enter a name and an optional description and proceed with the Next button
- Press the Add Settings button and select the Delivery Optimization option
- Select the DO Cache Host setting and enter the name or IP address of the cache host in the appropriate section

- Proceed with the selection of the remaining settings for the configuration of the Delivery Optimization functionality according to your needs
- Press the Next button
- Assign a Scope Tag if necessary and press the Next button
- Proceed with the assignment of the policy to a specific Entra ID group containing the devices that will receive the content from the MCC
- Complete the policy creation procedure through the Create button
References
Here are some useful references to the official documentation:
- Microsoft Connected Cache for Enterprise Frequently Asked Questions
- Troubleshoot Microsoft Connected Cache for Enterprise and Education
- Release Notes for Microsoft Connected Cache for Enterprise and Education
Conclusions
Microsoft Connected Cache offers an effective solution for companies looking to optimize their network usage; by reducing bandwidth consumption and accelerating content delivery, MCC helps improve end-user experience and avoid network bottlenecks.
