
The Microsoft Endpoint Privilege Management (EPM) solution allows you to manage the privileges of standard users by allowing them to perform operations that require administrative rights; this solution guarantees endpoint security by allowing all those users who had been elevated to administrators due to requirements (eg: running applications) to be downgraded to standard users.
In this article, we will explore how to manage privileges through the EPM solution available on Microsoft Intune.
Overview and requirements
Endpoint Privilege Management aims to authorize the execution of certain processes by users who do not hold elevated privileges; this occurs through the definition of security policies that determine who can access certain privileges and on which processes. These security policies can be based on a number of factors, such as the hash of the file or the certificate with which the executable was signed.
The advantages of using this solution are many:
- Reduced risk of attacks: Endpoint Privilege Management reduces the risk of cyber attacks by restricting privilege access to only authorized users and processes. This means that even if an account is compromised, the attacker will not have access to elevated privileges.
- Increased productivity: Endpoint Privilege Management allows you to efficiently manage user and process privileges without having to manually manage access rights. This means that users can access the resources they need quickly and efficiently.
- Simple and centralized management: through this solution, it is possible to authorize in a simple and centralized way which processes can be performed and by which users.
- Cost reduction: Endpoint Privilege Management can reduce the costs associated with managing various entitlements. This is possible through the automation of privilege management, which reduces the need for manual operations by IT staff.
In conclusion, the use of the Endpoint Privilege Management solution is an essential solution to ensure the security of the endpoints; the implementation of effective policies allows you to improve user productivity while maintaining an adequate level of security at the same time.
In this regard, this solution can be considered one of the fundamental pillars for the adoption of the Zero Trust model, especially with regard to the second principle of this model; in fact, the Zero Trust framework is based on three principles to protect assets:
- Explicit verification: it consists of always authenticating and authorizing, taking into account various aspects such as user identity, location or device status. It must start from a concept that devices and users should not be trusted.
- The other principle is the adoption of least privileges: this principle consists in providing users with the minimum privileges necessary to be able to perform their activities; it is possible to limit access through the “just-in-time” (JIT) and “just-enough-access” (JEA) models or through the adoption of adaptive policies.
- The last principle is related to minimizing the impact by minimizing exposure and segmenting accesses; going to define granular perimeters it allows to prevent what are defined as lateral movements by malicious attacks.
In order to proceed with the activation of Endpoint Privilege Management, the following prerequisites must be met:
- Windows 10 version 20H2 (or later) with hotfix KB5023773 or Windows 11 version 22H1 (or later) with hotfix KB5023774/KB5022913;
- Intune Suite license or purchase EPM standalone license as an add-on –
at the time of writing this article, being the solution in Preview, it is not necessary to have this type of licensing (it will be necessary only after the release of the solution in GA); - Devices must be in Hybrid join or directly joined to Azure AD;
In the next paragraphs, we will go into detail on the steps necessary to use this solution.
EPM activation
The first step in being able to start using the solution is to activate Endpoint Privilege Management from the Microsoft Intune management console; the procedure consists in the execution of a few simple steps:
- Sign in to the Microsoft Intune admin center console with administrative credentials.
- Select Endpoint Security – Endpoint Privilege Management.
- Press the Activate button.
Now, once this process is complete, you can create the configuration profiles needed to determine what actions are allowed and by which users.
Elevation Settings policy creation
To allow Windows 10/11 devices to correctly implement the configuration policies of the EPM function, it is necessary to create an Elevation Settings policy; this profile will activate the necessary features on the OS side.
Below are the steps necessary to create a new Elevation Settings policy:
- Sign in to the Microsoft Intune admin center console with administrative credentials.
- Select Endpoint Security – Endpoint Privilege Management – Policies.
- Press the Create Policy button.
- From the Platform drop-down menu, select Windows 10 and later.
- From the Profile drop-down menu, within the Elevation settings policy section.
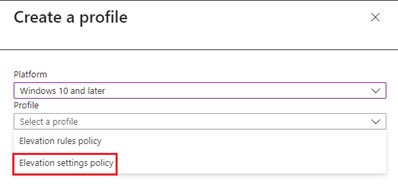
- Press the Create button.
- Assign a name, a possible description of the configuration profile and press the Next button.
- Keep the slider of the Endpoint Privilege Management setting on Enabled and set the remaining settings according to your needs:
- Send data to Microsoft: This option allows you to instruct clients to share diagnostic and usage data with Microsoft; as soon as this option is activated, it will be possible to define the level of shared data:
- Diagnostic data and managed elevations only (health status of the client component and elevations facilitated by EPM).
- Diagnostic data and all endpoint elevations (health status of the client component and all elevations that have occurred on the client).
- Diagnostic data only (client component health status only).
- Default evelation response: this option allows you to define the default behavior by EPM in response to the request for elevation of privileges on files not managed by the policies:
- Deny all requests (all elevation requests will be blocked).
- Require user confirmation (the user will be asked to enter their credentials, a justification or both).
- Confirm the changes using the Next button.
- Send data to Microsoft: This option allows you to instruct clients to share diagnostic and usage data with Microsoft; as soon as this option is activated, it will be possible to define the level of shared data:
- Press the Next button again.
- Click on Add groups and select an Azure AD group containing the interested users.
- Press the Create button to complete the policy creation process.
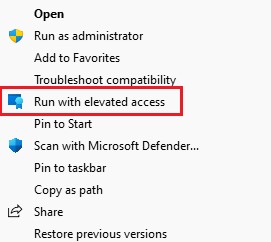
Once the policy has been successfully applied on Windows 10 and Windows 11 systems, by right-clicking on a file, it will be possible to view a new option in the context menu called Run with elevated access.
Elevation rules policy creation
As previously reported, Endpoint Privilege Management is based on security policies that determine who can access which privileges and on which processes; these security policies are called Endpoint rules policy.
Below are the steps necessary to proceed with their configuration:
- Sign in to the Microsoft Intune admin center console with administrative credentials.
- Select Endpoint Security – Endpoint Privilege Management – Policies.
- Press the Create Policy button.
- From the Platform drop-down menu, select Windows 10 and later.
- From the Profile drop-down menu, within the Elevation rules policy section.
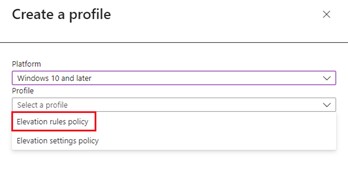
- Press the Create button.
- Assign a name, a possible description of the configuration profile and press the Next button.
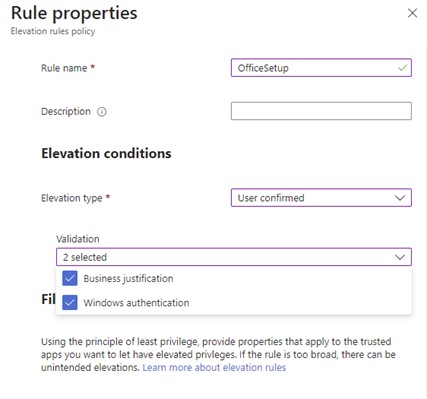
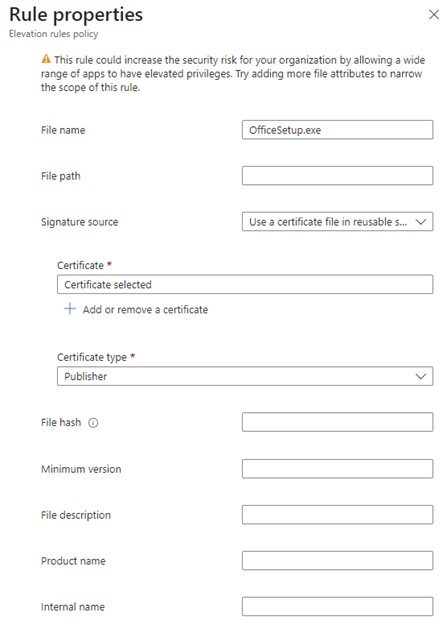
- Pressing on the Edit instance item, it is possible to start the process of defining a rule where it will be possible to define the following settings:
- Rule name: identification name of the rule.
- Elevation type: how the elevation process is started:
- User confirmed: as defined in the Endpoint settings policy, the user will be prompted to enter their credentials, a justification, or both.
- Automatic: elevation of privileges will happen automatically without any user iteration.
- File name: name of the file (including extension) that can be run with elevated privileges.
- Signature source: allows you to define the file validation methods that the user will have to perform; the available options are the following:
- Use a certificate file in reusable settings: allows you to define the digital certificate with which the file was signed and which appears to have been previously uploaded in the Reusable settings section (preview); Reusable settings simplify policy management as the change made to the setting will be replicated on all policies where the Reusable settings have been specified.
- Upload a certificate file: allows you to define the digital certificate with which the file was signed.
- Not configured: if no certificate is specified, validation will be done through the hash file.
- File Hash: hash of the file that can be executed with elevated privileges; this settings is mandatory if the Not configured option has been selected from the Signature Source drop-down menu. To determine the hash of the file, you can use the following command let Powershell: Get-FileHash <file>
- Press the Save button.
- Confirm the changes using the Next button.
- Press the Next button again.
- Click on Add groups and select an Azure AD group containing the interested users.
- Press the Create button to complete the policy creation process.
User Experience
Once all the policies defined in the previous paragraphs have been applied, the user will be able to start the application/s that require elevated privileges without the need to assign administrative rights to the user.
As previously indicated, the user will have to right-click on the file and select the Run with elevated access option.
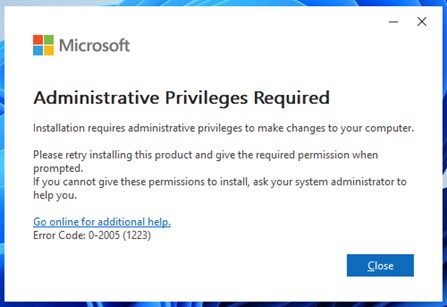
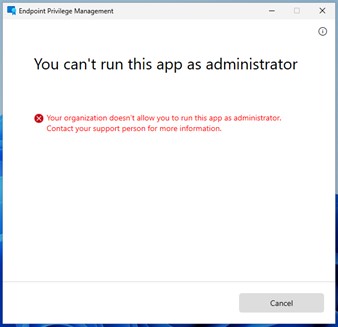
In case the file does not fall within the defined policies, the user will receive an error message that blocks the privilege elevation action (if the Default evelation response option has been set to Deny all requests).
Instead, if the file falls within the defined policies, the user will be asked to enter their credentials, a justification or both options based on what is defined in the configuration policies.
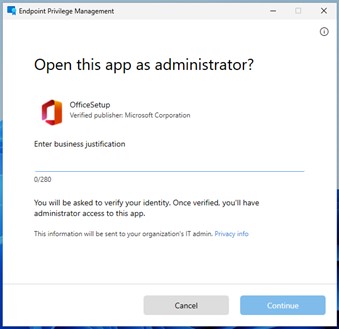
If you are asked to enter your credentials, the process involves performing a few steps:
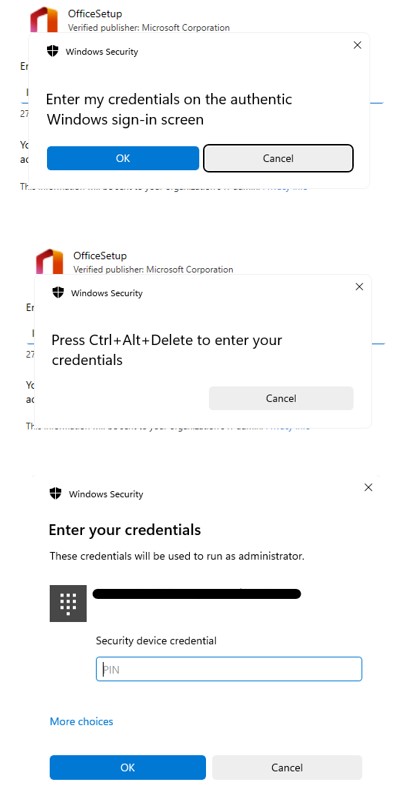
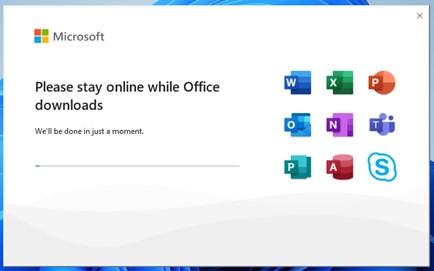
Once the credentials are validated, the user will be able to successfully run the application(s) with elevated privileges.
References
Here are some useful references to the official documentation:
- Use Intune Suite add-on capabilities
- Reports for Endpoint Privilege Management
- Data collection and privacy for Endpoint Privilege Management
Conclusions
In this article, the various steps necessary to activate the Endpoint Privilege Management feature available on Microsoft Intune have been reported.
The adoption of this solution allows IT Admins to minimize the risks generated by standard users who, for various needs, have been elevated to local administrators of the endpoints.
